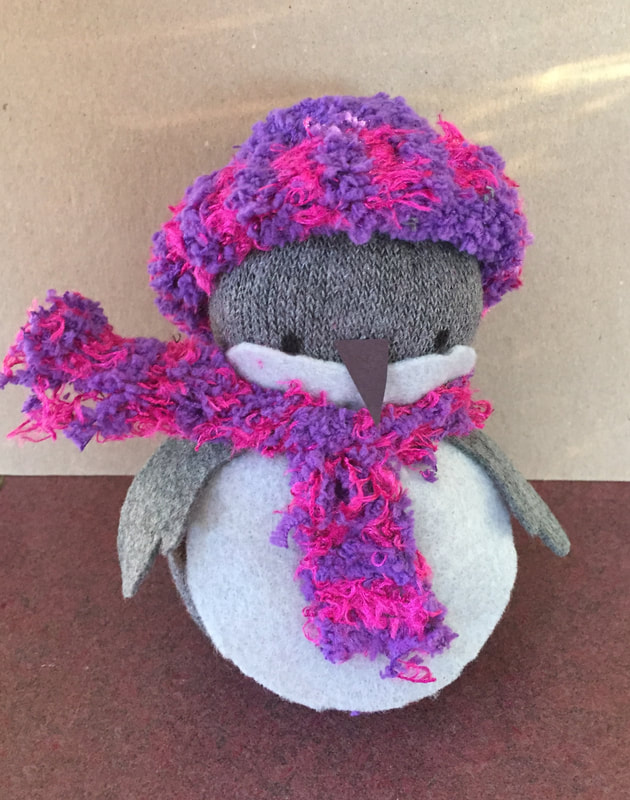
 Sock and felt Kipling craft based on LOVE, MAMA (c) 2018 Jeanette Bradley This is a craft I developed for a public library event. Young children will need assistance from an adult. Older children can work in pairs. For a large group project, it is easier to prep the craft before the event by cutting out the felt pieces so that kids can focus on assembling their penguin chicks. You will need: Gray adult socks (one pair will make four penguins) Colorful adult socks Light gray felt Dark gray felt (try to match the socks) Rice (one cup per penguin) Rubber bands (5 per penguin) Fine point marker, such as a sharpie Black construction paper Glue (I used tacky glue, a glue gun would also work) Step 1: Cut the sock in half, avoiding the heel  Step 2: Turn sock inside out. Use a rubber band to close one end of the tube, then turn inside right again. 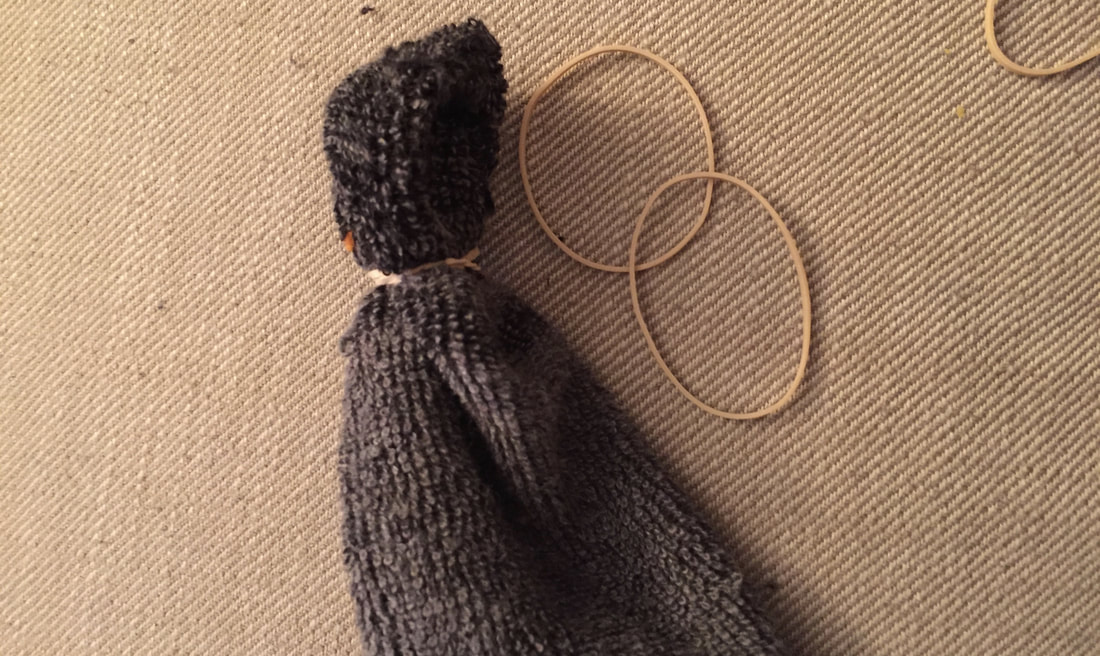 Step 3: Pour rice into your sock. Using a measuring cup with a spout or a plastic cup that you can squeeze into a spout shape makes this step less messy. 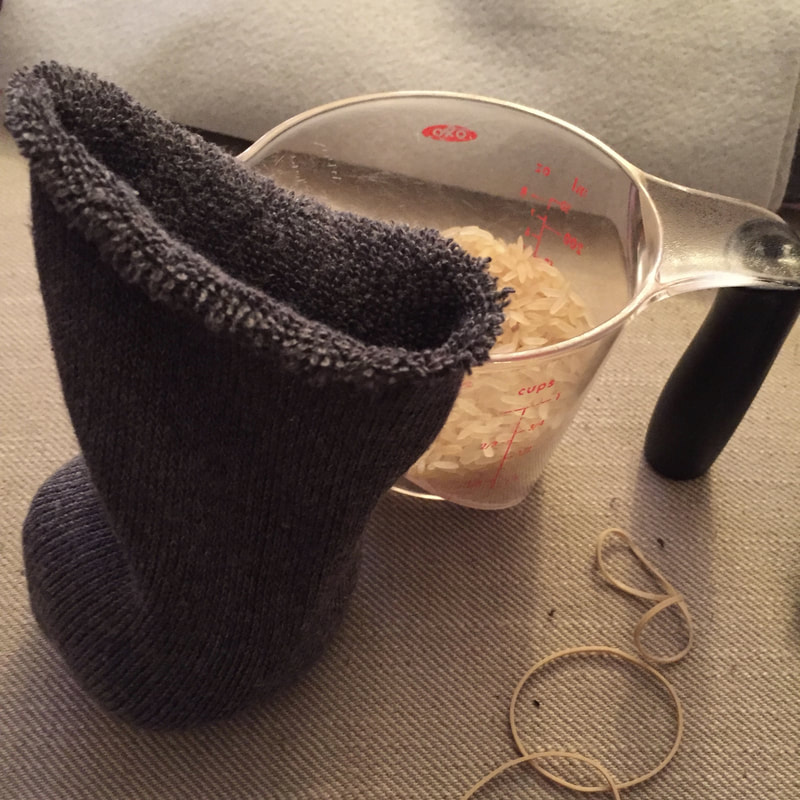 Step 4: Pour the entire cup of rice into the sock, then tie off the top with a rubber band.  Step 5: Use another rubber band to create a neck for your penguin chick. 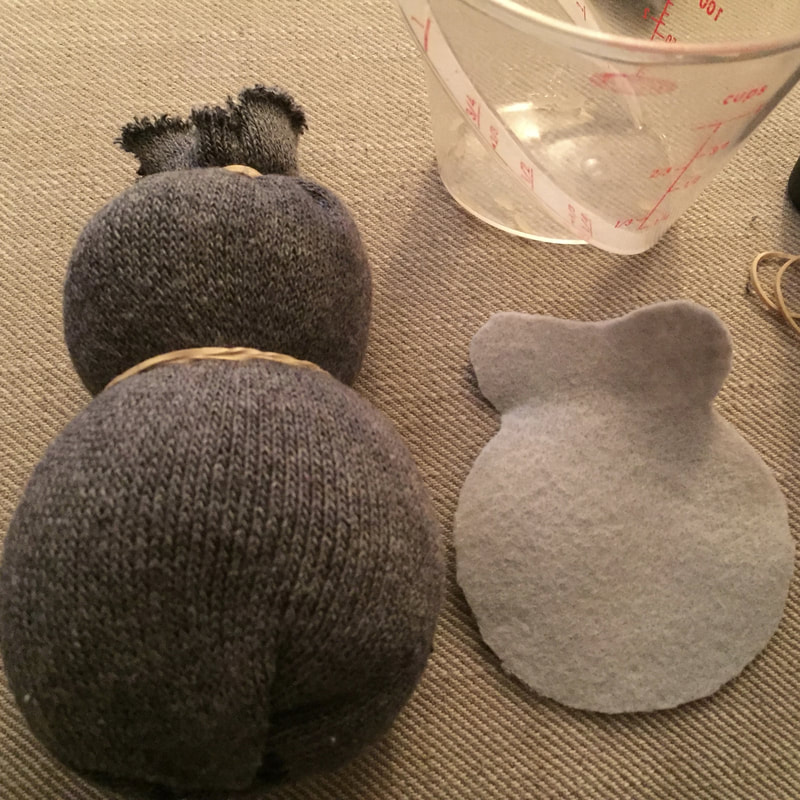 Step 6: Slide the light gray felt belly piece under the next rubber band to create Kipling's belly fuzz. Then slide the arms under the rubber band to attach them. 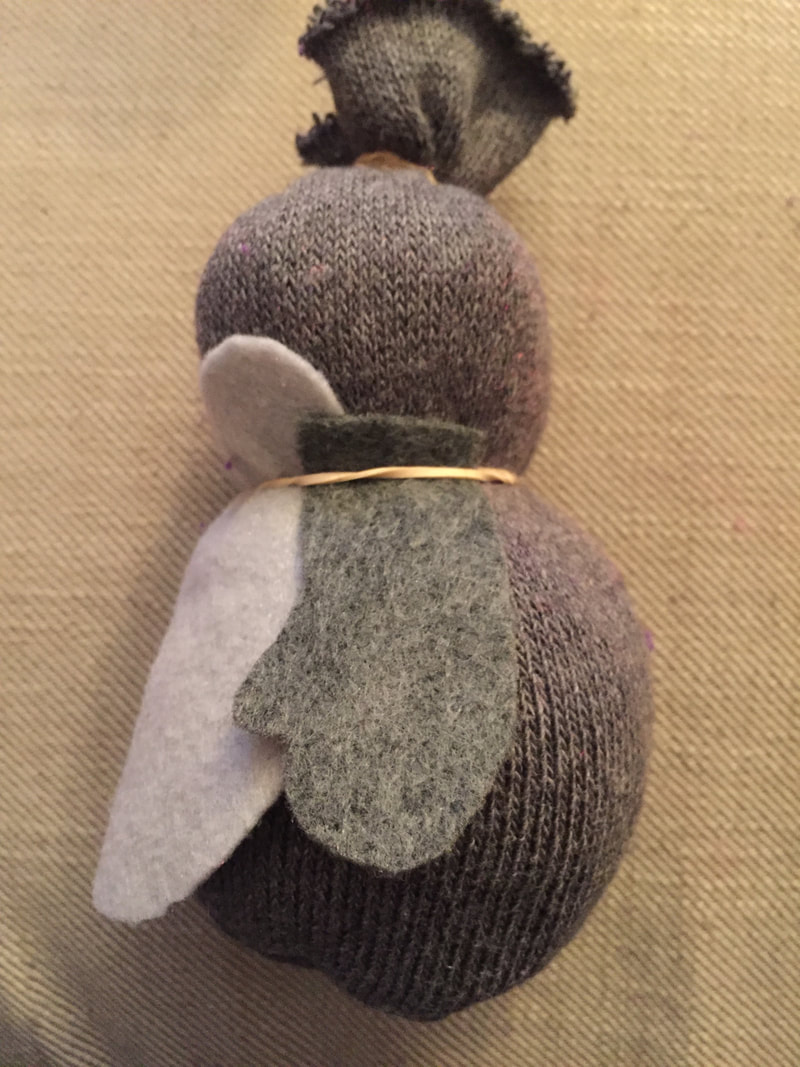 Step 7: Cut off the toe of the colorful sock to use as a hat. You can also create a beanie hat with a pom pom on top by cutting a wide band of the sock and rubber banding one end. Cut a narrow strip of the same sock to create a scarf. 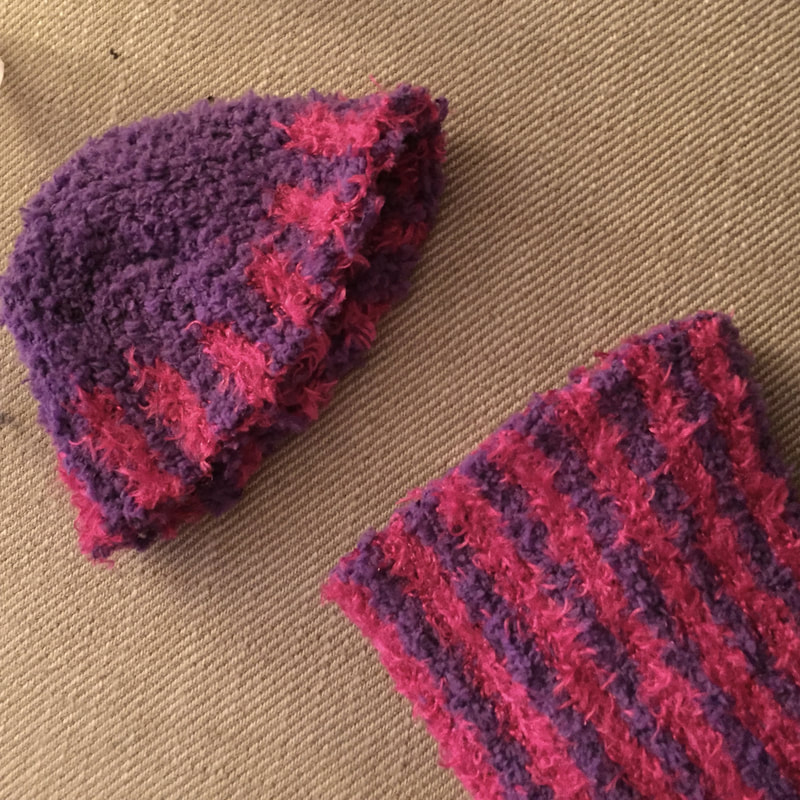 Step 8: Put on the hat and scarf. Adjust the belly and arms until your chick looks symmetrical, then glue into place. 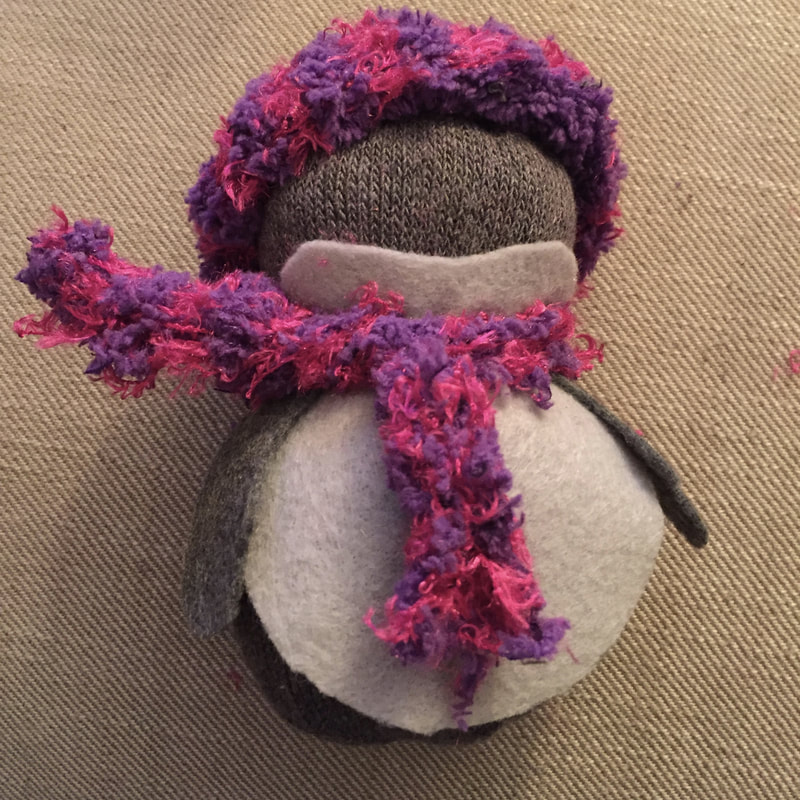 Step 9: Draw dots for eyes right above the cheek line. Cut out a small triangle of black construction paper for your chick's nose, and glue it on.  Let your new friend dry before playing with him or her! Click below for a printable PDF pattern. 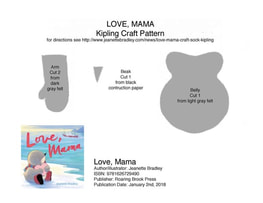 Click image to download a printable PDF Comments are closed.
|
AuthorJeanette Bradley loves penguins, art, and chocolate, though not all at once. Categories
All
|
 RSS Feed